The radius of a review
With use-case opinions established in my earlier post “The Radius of Anger” (click link) what’s the mount like to actually use?
First up is the choice of “hoops”. This is the most significant aspect of the Radius mount, as with each model (Rad1 & Rad2) you get two sets, a black pair which equates to what’s known as 72 shore, & a Radius-blue pair of 62 shore. The shore effectively refers to the stiffness of the loops, the choice of which will have quite a distinctive effect on the final outcome of the mount. For example, the blue 62 shore hoops are far more supple than the black 72 shore, which in turn will yield improved low-frequency (handling noise) transference isolation from the boom to the mic. The widened suppleness of the 62 shore though won’t provide as much support for a shotgun mic, where the balance point of the hoops will be far too front heavy, meaning any swings or movement of the pole will meet less resistance from the hoops suspension, resulting in the mic rocking about too heavily, & depending on the speed of an operators swing, may even result in unchecked momentum making the mic itself collide with the inside of the loops structure, resulting in a cue-breaking knock sound. So the choice of loop is a greatly important consideration with regard to the mic you choose to mount in it.
While this may seem like a confusing initial process for the Radius mount, it is in fact very much a plus point, as each package comes with both 62 & 72 shore loops as stock, giving you the option to really optimise the setup of the mount for your choice of microphone. For example, for a light & relatively small shotgun “pencil” mic like the Sennheiser MKH8060 or DPA4017 (with a stock sponge wind gag), I’d actually recommend using a black 72 shore loop at the front of the mount, with a blue 62 shore loop at the back, giving good isolation for the mic, while providing decent resistance for the front overreach of the shotgun profile. If you were instead to use a shotgun of traditional length (like a Sennheiser 416, Sanken CS3e, Rode NTG3, Schoeps CMIT-5u), then using 2x 72 shore loops would be recommended, especially if you were to mount a fluffy deadcat or perhaps a Bumblebee spacer on the mic, which adds additional weight & bulk to the front loaded profile.
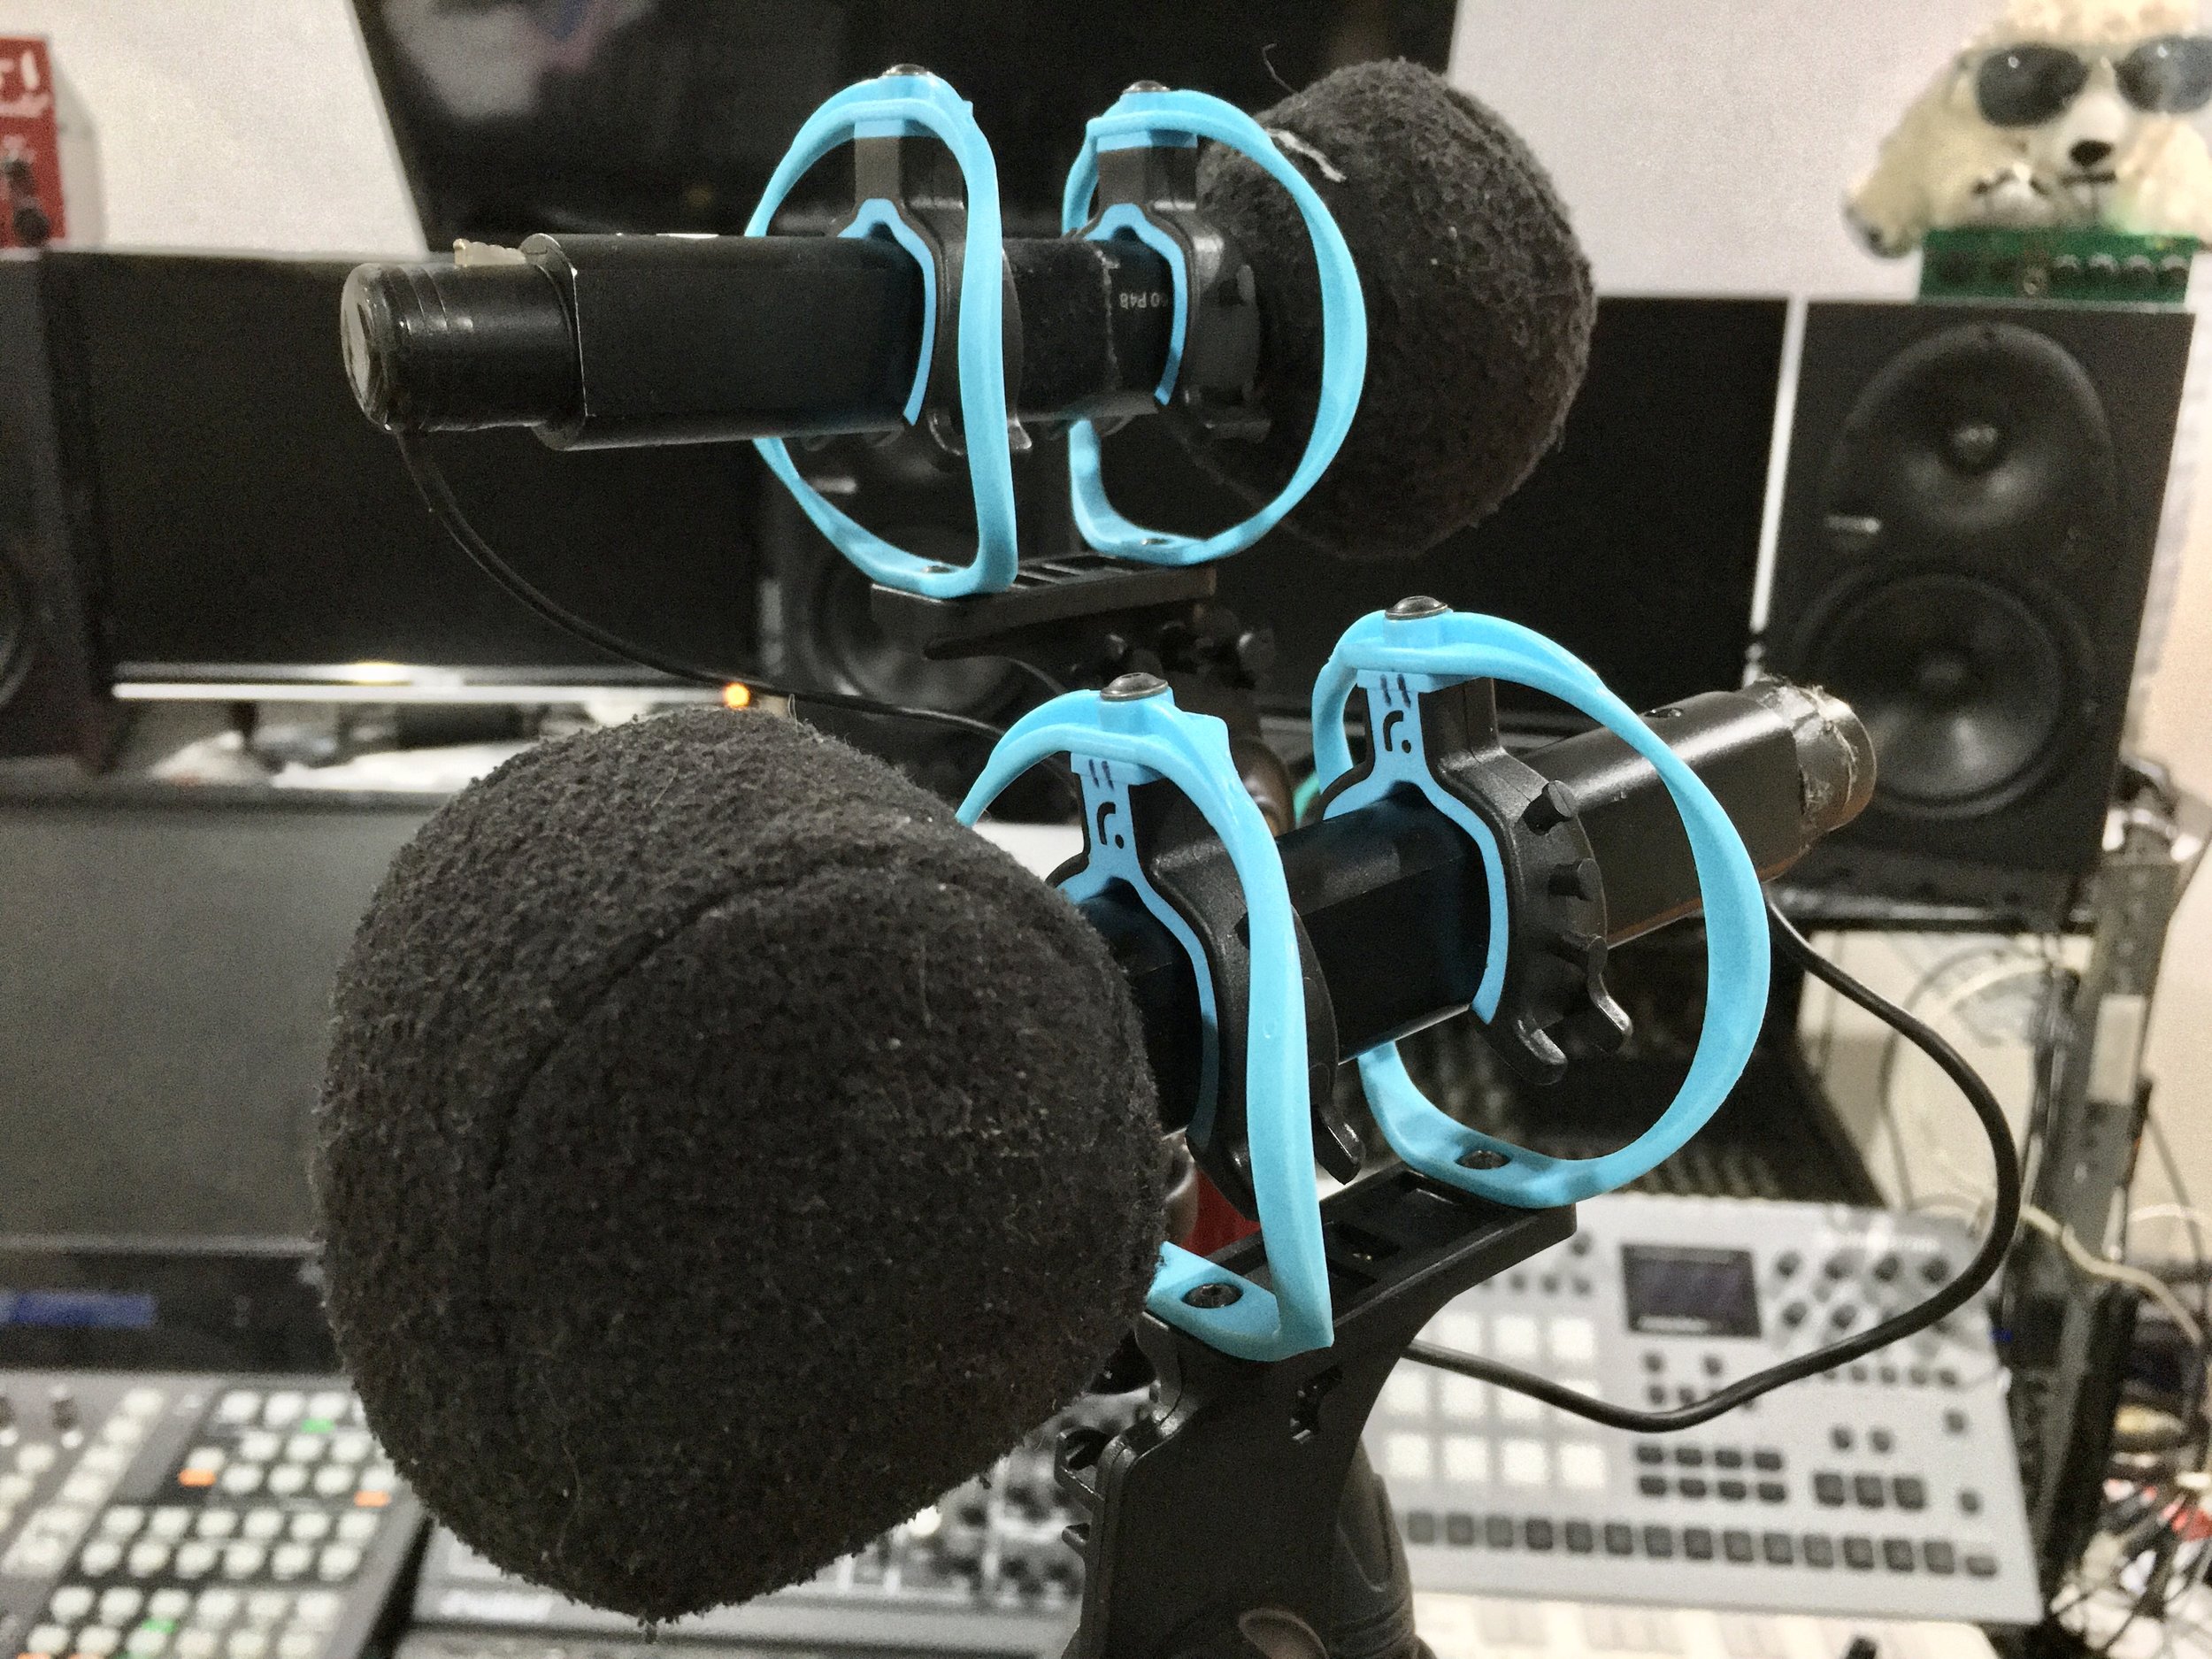
For the trial shoot mentioned here, I opted to setup the mounts with 2x Blue 62 shore loops, as my aim was to achieve superior performance over my previous setup of Rycote Invision mounts with 62 shore lyre. This setup was for my 2x Sennheiser MKH50 hyper-cardioid microphones, which are smaller than a shotgun mic, relatively light, but are known for being susceptible to handling noise when not setup correctly or operated by a skill boom op (I also recommend this configuration for other small cardioid & hyper-cardioid microphones, such as the Sennheiser MKH8040, MKH8050, Schoeps CMC5/6/1+4/41, & DPA4018).
This decision was based off testing I’d previously carried out (See results here - “The Radius of Mounts”), that showed significantly improved low-frequency isolation in normal use-case, with more extreme operation & pole handling actually shifting transferred sound further up into the audio spectrum. While this result is possibly negative, in real-world application, any operator doing the kind of pole-movement & finger-tapping needed to trigger this higher frequency artefact, would most certainly not be considered even a novice level with boom operation, with the reality being that in the hands of a skilled operator (& especially a professional) the mounts loops response will actually give a far larger margin of handling isolation, which is the ultimate goal of what I consider to be a real working upgrade.
Some other points of interest to the mount; with my setup I use bespoke right-angle XLRf connectors, to give the smallest mic profile possible, to which the cable length I have is too small to feed through the built-in cable management hooks on the mount, to which I’d caution anyone using short cables (known as “shorties”) with this setup, to acknowledge the length of the cable, & not feel obliged to use the cable management hooks (if your cable is too short). If the cable you have is of the right length though, it is advisable, the key point being to make sure the cable isn’t “pulling” on the back of the mic & adding unwanted strain-load on the rear Loop, it should be unhindered & able to move freely to work at its best.
The articulation point on the base of the mount is thick, with the mechanism having teeth. This quantisation restricts the available resolution of the rotation when breaking or opening of the neck, which reduces the specificity available for the angle of the mic, the take (to this give) being that once you land on the angle you wish to work with, you won’t get any slip from the head of then mic once the nut is tightened, to which you won’t have to crank the nut to ensure no slippage, where on other mounts (Cinela, Rycote) you will have to make the bolt is tight, which in turn adds wear to the mechanism.
The actual mic grip itself is an interesting design, as it has a feature allowing for the pinch to effectively be locked with the mic in place, meaning if you keep the mic rigged in a mount for packing, it won’t come loose (it’s rather durable). This does add a very small amount of weight to the grip, but more importantly expands the profile of the grip within the loop, with the teeth leaving less room for play within the Lyre hoop. For my setup, I removed then fastening strap altogether, as I keep my microphones in a secure box for transit & build them at location. The grips are a little fiddly to open up & get a mic into, especially for the MKH50 (my preferred hyper-cardioid), which has a slightly unusual shape to it’s design & is thicker at 22mm to the more standard 19mm size of many other mics (Speaking of the team at Radius, it seems there will be some specific grips available soon for the MKH30/40/50/60/70 range, something I plan to mine once they are available). Because of this Putting the mic in the mount wasn’t a quick process, the trade-off from a speed-of-build being that once in place, the grips do a great job of holding my the mic securely, you’d have to do a pretty destructive shake to make the mic fall out. With this point in mind, the mount isn’t ideal for fast mic change-overs, & this is something to consider if your workflow requires repeated mic changes in the day (while using the same mount). For my workflow, I have a separate mic mounts for each of my mics, with pre-rigged XLR shorties & a quicklok system in place, so when on location, we setup the mics we expect use (Ideally ahead of time) & then change the whole rig according to the needs of the situation, so the fast change over isn’t one I’m particularly effected by.
At the base of the mount comes an included XLR holder, which is always a useful addition to have, especially for systems such as mine where I have individual rigs for each setup. The holder feels “loose” before it’s screwed to pole/stand, but the threading process clamps it in place, so worry not (mine come pre-rigged with quicklok spigots screed in, so the XLR arm is tightly in place). The XLR holder can be user-orientated (unlike some Cinela mounts), so can be adjusted as best suits the needs of your workflow. It can also be “unclipped”’from the mount & removed entirely if it’s surplus to your setup, no point adding a piece of plastic to the end of a pole if it’s not being used.
A point that I initially missed, was the difference between the RAD1, & the RAD2. There is info about this on the Radius website, but this detail isn’t really highlighted much so it’s easy to miss. The RAD1 has loops that are perfectly round, while the RAD2 has small lips at the top of the loop, which are in place to add extra support for the grips when used with heavier mic setups (for instance, shotguns with fluffy wind-gags that have a front-loaded weight profile). This helps stop the loops bowing too much in these situations, definitely something to factor in when making your choice of mount. A quote from the websites description - “The RAD-2 hoops are slightly thicker than RAD-1 hoops and have an extra 3mm of bracing on top to hold the extra weight of front-heavy microphones.”
Lastly, an interesting discovery in the few months since the RAD mounts release, was that the Lyre are actually compatible with Rycote mounts, which allowed me a simple swap-over of a couple of sets of RAD1 loops, to recycle older hilts. I decided to do this for my small mounts for Sennheiser MKH8040. When getting supplies for the previous manufacturer, I’d have to ring my supplier & have them order the shore 62 Lyre specially, but Radius have all the composite parts easily searchable & directly available on they’re website, finding & ordering the extra bits was a doddle. Taking this modular approach a step further, is that the hilt/base section of the RAD1/2/3 mounts, will be compatible with the future “Alto” basket add-on, which mates with the standard mount & adds a full windshield, meaning all mounts can easily be upgraded to be used as external baskets with fluffy over-cover, & then when moving inside, you simply remove the outer basket for a minimized setup more suitable for indoor use.
When the company Radius first popped up in the SCU (sound cinematic universe), I was instantly intrigued, as I was aware of the talent that comprised the company. They initially showed prototypes of the mounts, & from the look of the design, I could see the potential they had, & kept a keen eye on theyre development as a possible successor to my collection of Rycote Invision mounts for my internal microphones. When I finally got my hands on them & began testing, I felt very strongly that my enthusiasm was well placed, as they showed an immediate performance improvement over my existing setup, which in turn gives my boom operators far better tools to use in anger, while fighting the good-sound fight in the trenches of a hot set, & anything that makes my boom ops job of getting better boom tracks easier, is something I’m certainly going to be keen to invest in, as ultimately, it’s those boom tracks that will yield me better mixes, & the production better sound! They say the Proof is in the pudding, & I’ve since gone on to add Radius Loops for all my internal mic mounts.
A final point I feel should be made, is the communication between the company Radius, & it’s end users. Customer service is incredibly hard-won, but I can’t say enough good things about them in that regard, in the FEW instances I’ve had to reach out to them for something, they’ve digested the situation & had solutions sent out to me incredibly quickly, they solve problems, which is amazing to see as a company culture. Even further to that, they’ve been wonderfully interactive with the sound community, actively seeking feedback from us, the end users, on design points of future products, this communication I feel is incredibly important, as it means we’ll have better tools, that address more problems, with stronger solutions. If you’re considering a Radius product, or have questions, I encourage you to reach out to them, they’re great.
In closing, I am one of many Simons, & I would recommend.